
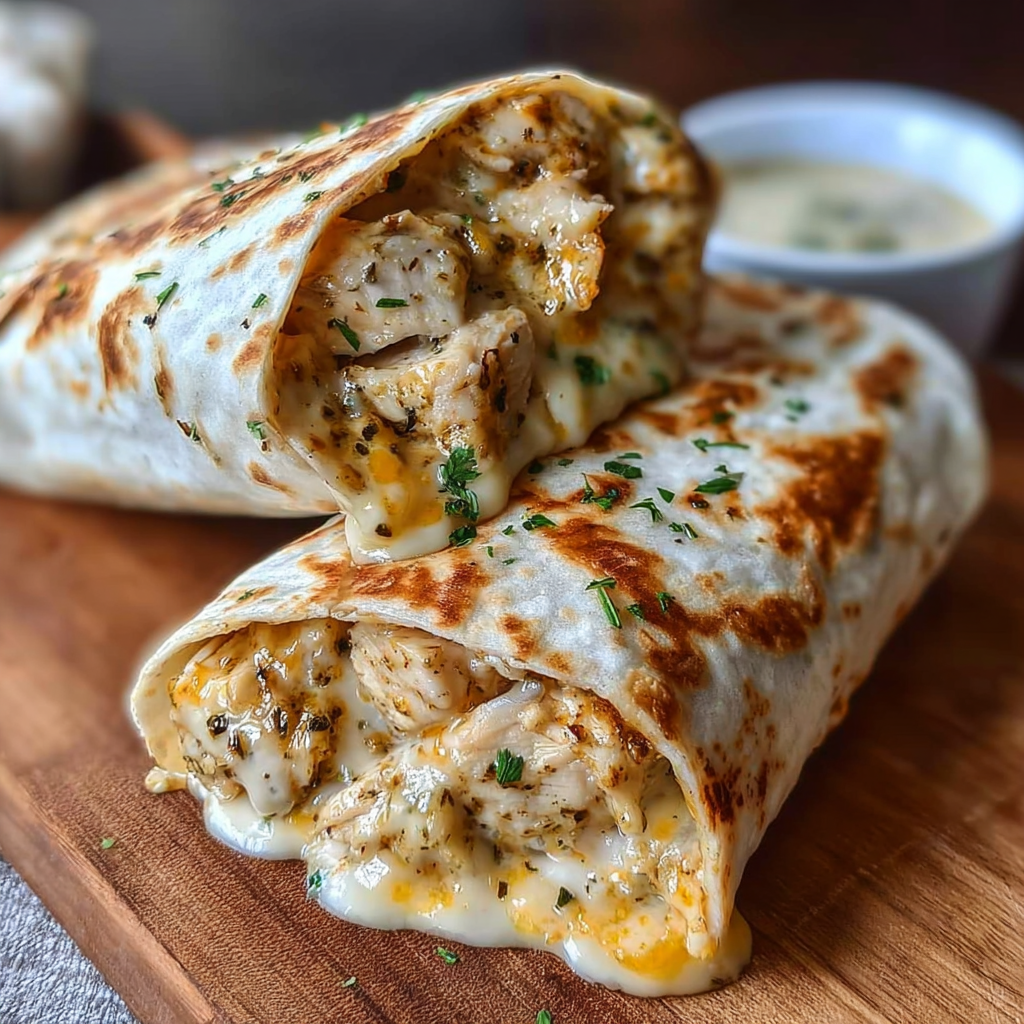
When comfort food meets convenience, you get cheesy garlic chicken wraps – the perfect solution for busy weeknights when you’re craving something indulgent yet quick to prepare. These golden, crispy wraps pack tender chicken, melted cheese, and aromatic garlic into a handheld meal that’s pure satisfaction in every bite.
What makes this recipe truly special is its incredible versatility and foolproof preparation method. Following proper food safety guidelines when handling chicken ensures your family enjoys these wraps safely, while the simple ingredient list means you can whip them up with pantry staples. The contrast between the crispy exterior and gooey, cheesy interior creates a textural experience that rivals your favorite restaurant appetizers.
According to detailed nutritional information from nutrition databases, these high-protein wraps provide substantial nutrition while satisfying those comfort food cravings. Whether you’re feeding hungry teenagers, looking for a quick lunch solution, or need a crowd-pleasing dinner option, these wraps deliver on all fronts.
What Are Cheesy Garlic Chicken Wraps?
Cheesy garlic chicken wraps are essentially a handheld comfort food that combines seasoned chicken with melted cheese and garlic, all wrapped in a flour tortilla and cooked until golden and crispy. Think of them as a cross between a quesadilla and a chicken roll-up, but with that irresistible garlic flavor that makes them absolutely addictive.
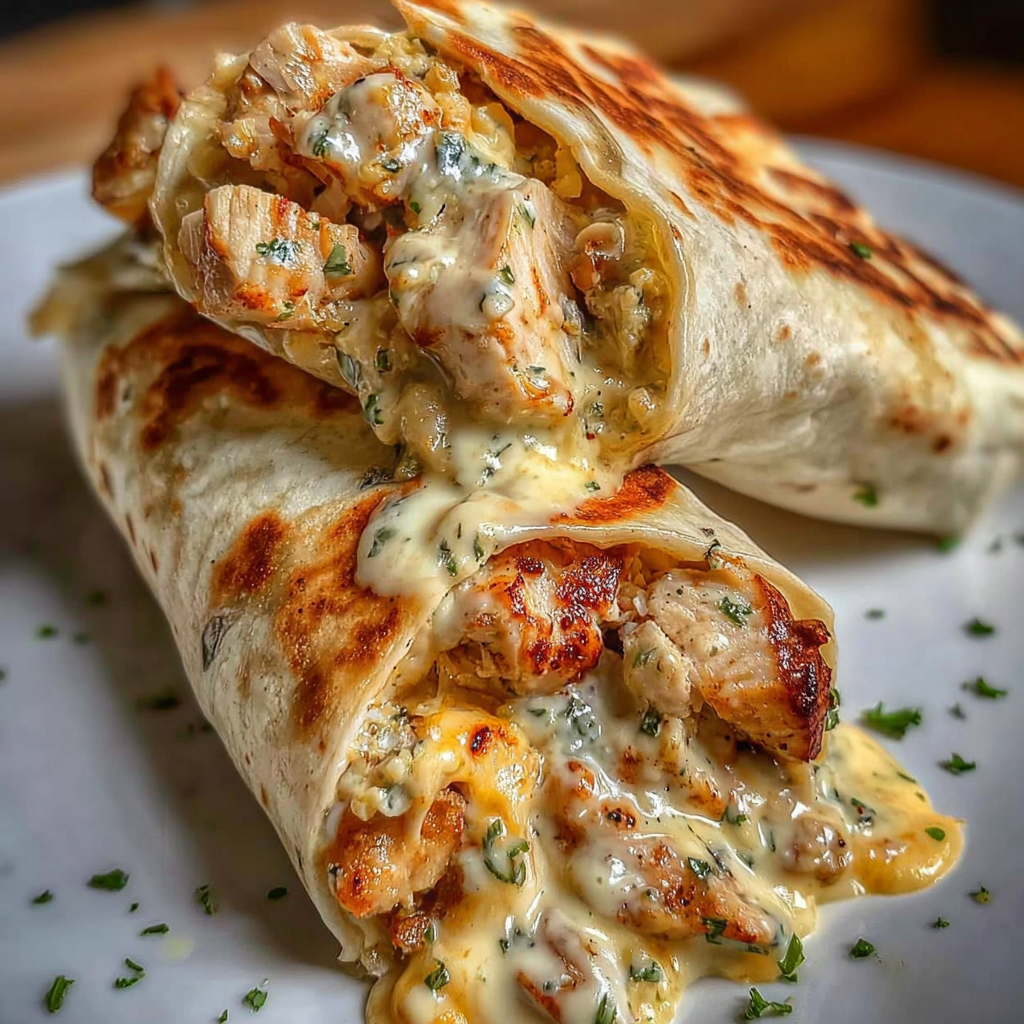
The beauty of this dish lies in its simplicity – you’re basically creating a flavor-packed filling that gets sealed inside a tortilla and pan-fried until perfectly crispy. Unlike traditional wraps that are served cold, these are cooked hot, which allows the cheese to melt completely and the flavors to meld together beautifully.
Why You’ll Love This Recipe
These cheesy garlic chicken wraps tick every box for the perfect weeknight meal:
• Lightning-fast preparation – Ready in just 20 minutes from start to finish • High-protein satisfaction – Each wrap packs a serious protein punch to keep you full • Budget-friendly ingredients – Uses simple, affordable pantry staples • Kid-approved flavor – The combination of cheese and garlic appeals to all ages • Meal prep friendly – Make ahead and reheat throughout the week • Versatile timing – Perfect for lunch, dinner, or even late-night snacks • Minimal cleanup – Just one pan needed for cooking
The comfort food factor is undeniable, but unlike heavy casseroles or complicated dishes, these wraps won’t leave you feeling sluggish. They’re substantial enough to satisfy hearty appetites while being light enough that you won’t need a nap afterward.
Essential Ingredients Breakdown
Main Components
Cooked Chicken forms the protein base of your wraps. You have several excellent options: • Rotisserie chicken – The ultimate convenience option that’s already perfectly seasoned • Leftover chicken breast – Great way to repurpose previous night’s dinner • Freshly cooked chicken – Gives you complete control over seasoning and texture
Cheese Selection is crucial for that perfect melt: • Sharp cheddar – Provides bold flavor and excellent melting properties • Mozzarella – Creates that satisfying cheese pull factor • Cream cheese – Adds richness and helps bind everything together
Large Flour Tortillas serve as your wrap foundation: • Choose burrito-size tortillas (10-12 inches) for best results • Fresh tortillas wrap and seal better than older ones • Room temperature tortillas are more pliable and less likely to crack
Fresh Garlic makes all the difference: • Minced fresh garlic provides the most robust flavor • Use 2-3 cloves for moderate garlic taste, more for garlic lovers • Garlic powder can substitute but won’t deliver the same punch
Supporting Ingredients
The supporting cast elevates these wraps from good to extraordinary:
• Onion powder – Adds depth without the texture of fresh onions • Black pepper – Essential for balancing the rich cheese flavors • Italian seasoning – Brings herbaceous notes that complement garlic perfectly • Paprika – Adds subtle warmth and color to the filling • Salt – Essential for bringing out all the other flavors
Optional Add-ins for Extra Flavor
• Fresh spinach – Adds nutrition and a pop of color • Diced bell peppers – Provides crunch and sweetness • Caramelized onions – Takes the flavor profile to restaurant levels • Sun-dried tomatoes – Mediterranean flair that pairs beautifully with garlic
Kitchen Tools and Equipment Needed
Having the right tools makes this easy chicken wrap recipe even simpler:
• Non-stick skillet or griddle – Essential for even cooking and easy flipping • Medium mixing bowl – For combining your filling ingredients • Measuring cups and spoons – Ensuring proper seasoning ratios • Flexible spatula – Makes flipping wraps foolproof • Sharp knife – For clean cuts when serving • Cutting board – Safe prep surface for all ingredients
Optional but helpful: • Panini press – Creates perfectly even browning and crispy texture • Kitchen scale – For consistent portion sizes if meal prepping
Step-by-Step Recipe Instructions
Preparation Phase
Prepare the Filling (5 minutes)
Start by combining your shredded chicken with the cheese mixture in a medium bowl. If using rotisserie chicken, remove any skin and shred into bite-sized pieces. Mix in your cream cheese first – this acts as a binder and creates that luxurious, creamy texture.
Add your minced fresh garlic, onion powder, black pepper, and Italian seasoning. The key here is to taste as you go – the filling should be well-seasoned enough to flavor the entire wrap. Mix everything until you have a cohesive, spreadable consistency that holds together well.
Assembly Process (5 minutes)
Lay your flour tortilla flat on a clean work surface. Place about 1/3 cup of filling in the center, leaving about 2 inches of space on all sides. This prevents overfilling, which is the number one cause of messy, hard-to-flip wraps.
Spread the filling in a rectangular shape rather than a circle – this makes rolling much easier. Fold in the sides first, then roll from the bottom up, creating a tight cylinder. The seam should be on the bottom when you place it in the pan.
Cooking Method (8-10 minutes)
Heat your non-stick skillet over medium heat – this is crucial for achieving that perfect golden exterior without burning. Add a small amount of butter or olive oil to the pan.
Place your wraps seam-side down in the pan. This helps seal them closed as they cook. Cook for 3-4 minutes until the bottom is golden brown and crispy. Using professional cooking techniques, flip carefully with a spatula and cook the other side for another 3-4 minutes.
The wraps are done when they’re golden brown on both sides and the cheese is completely melted. You’ll know they’re ready when they feel firm to the touch and make a slight sizzling sound when pressed gently with the spatula.
Pro Tips for Perfect Wraps
Mastering cheesy garlic chicken wraps comes down to understanding a few key techniques:
Temperature Control is Everything • Use medium heat consistently – high heat burns the outside before the cheese melts • Let your pan preheat for 2-3 minutes before adding wraps • If the outside browns too quickly, lower the heat and cover with a lid
The Seam-Side Down Rule • Always start cooking with the seam on the bottom • This natural weight helps seal the wrap closed • Don’t flip until the seam has had time to “set” (about 3 minutes)
Don’t Overfill – Ever • More filling seems better, but it makes wraps impossible to roll properly • 1/3 cup of filling is the sweet spot for standard burrito-size tortillas • Overfilled wraps burst open during cooking and create a mess
Cheese Distribution Matters • Spread cheese evenly throughout the filling, not just in clumps • The cream cheese should coat the chicken pieces • Shredded cheese should be mixed in, not just sprinkled on top
Resting Time Prevents Disasters • Let cooked wraps rest for 2-3 minutes before cutting • This allows the melted cheese to set slightly and prevents it from oozing out • Use this time to prepare your sides or clean up
Make-Ahead Strategy for Busy Schedules • Assemble wraps completely and refrigerate up to 24 hours • Bring to room temperature for 10 minutes before cooking • Meal prep by making double batches and freezing extras
Recipe Variations and Customizations
Protein Alternatives
Leftover Rotisserie Chicken Tips The convenience of rotisserie chicken can’t be beaten for busy weeknights. Remove all skin and bones, then shred the meat with two forks. The pre-seasoned nature of rotisserie chicken means you might need less additional seasoning, so taste your filling before adding salt.
Turkey Substitute Options Leftover turkey works beautifully in this recipe, especially after holidays. Turkey tends to be slightly drier than chicken, so add an extra tablespoon of cream cheese to maintain that creamy texture. Smoked turkey from the deli counter creates an interesting flavor variation.
Vegetarian Protein Alternatives • Seasoned black beans – Mash half for binding, leave half whole for texture • Grilled portobello mushrooms – Diced and sautéed with garlic • Crispy tofu – Cubed and pan-fried until golden
Cheese Combinations That Work
Mexican Blend Variations • Pepper jack adds a spicy kick that complements garlic beautifully • Queso fresco mixed with cheddar creates authentic Mexican flavors • Monterey Jack provides creamy mildness that lets garlic shine
Italian Cheese Options • Provolone and mozzarella for a more sophisticated flavor profile • Parmesan mixed into the filling adds sharp, nutty notes • Ricotta instead of cream cheese creates a lighter texture
Flavor Variations to Try
Spicy Version Transform your cheesy garlic chicken wraps into fire with these additions: • Diced jalapeños – Fresh or pickled both work well • Hot sauce mixed directly into the filling • Cayenne pepper for heat without texture • Pepper jack cheese instead of regular cheddar
Mediterranean Style • Fresh spinach wilted into the filling • Sun-dried tomatoes chopped fine • Feta cheese mixed with mozzarella • Fresh basil and oregano instead of Italian seasoning
Ranch Style Integration • Ranch seasoning packet mixed into the filling • Ranch dressing as a dipping sauce • Bacon bits for extra indulgence • Green onions for fresh crunch
Buffalo Chicken Version • Buffalo sauce mixed with the chicken • Blue cheese crumbles added to the cheese mix • Celery seed in the seasoning blend • Serve with ranch or blue cheese for dipping
Nutritional Information and Health Benefits
Understanding the nutritional profile of your cheesy garlic chicken wraps helps you make informed decisions about portions and modifications.
Each standard wrap (using the base recipe) contains approximately: • Calories: 380-420 per wrap • Protein: 25-30 grams (excellent for muscle maintenance) • Carbohydrates: 35-40 grams (primarily from the tortilla) • Fat: 18-22 grams (mostly from cheese and cooking oil)
Health Benefits Worth Noting • High protein content supports muscle health and keeps you satisfied longer • Garlic provides antioxidants and may support immune system function • Calcium from cheese supports bone health • B vitamins from chicken support energy metabolism
Healthier Ingredient Swaps • Whole wheat tortillas increase fiber content • Reduced-fat cheese cuts calories without sacrificing too much flavor • Greek yogurt instead of cream cheese adds probiotics • Spinach additions boost iron and vitamin content
Portion control is key – these wraps are satisfying enough that one is typically sufficient for most adults, making them naturally portion-controlled compared to many comfort foods.
Serving Suggestions and Pairings
Side Dishes That Complement
Fresh Salad Combinations • Simple green salad with vinaigrette cuts through the richness • Cucumber tomato salad provides fresh, cooling contrast • Coleslaw adds crunch and tangy flavor balance
Roasted Vegetables • Roasted bell peppers echo the flavors in Mediterranean variations • Roasted asparagus with lemon provides elegant balance • Sweet potato fries satisfy the comfort food craving completely
Soup Pairings • Tomato soup for the ultimate comfort food combination • Chicken broth based soups complement without competing • Gazpacho in summer for temperature contrast
Beverage Suggestions
Family-Friendly Options • Iced tea – Sweet or unsweetened both work well • Lemonade provides acidic balance to rich flavors • Sparkling water with lemon cleanses the palate
Seasonal Considerations • Hot chocolate in winter for ultimate comfort • Fresh fruit agua fresca in summer • Apple cider in fall complements garlic flavors
Presentation Ideas
Cutting and Plating Techniques • Cut diagonally for the most attractive presentation • Arrange cut-side up to show the colorful filling • Garnish with fresh herbs like parsley or chives
Party Serving Tips • Cut into smaller pieces for appetizer portions • Provide dipping sauces in small bowls • Arrange on platters with colorful vegetable garnishes
Storage and Meal Prep Guide
Proper storage keeps your cheesy garlic chicken wraps fresh and safe for later enjoyment.
Refrigerator Storage • Cooked wraps stay fresh for 3-4 days in the refrigerator • Wrap individually in aluminum foil or plastic wrap • Store in airtight containers to prevent them from drying out
Freezing Instructions • Freeze for up to 3 months for best quality • Wrap individually in plastic wrap, then aluminum foil • Label with date and contents • Freeze flat, then store upright to save space
Reheating Best Practices • Oven method: 350°F for 10-15 minutes (best for maintaining crispiness) • Skillet method: Medium heat for 2-3 minutes per side • Microwave: 30-second intervals, though this softens the exterior
Make-Ahead Assembly Tips • Assemble completely but don’t cook • Refrigerate up to 24 hours before cooking • Bring to room temperature 10 minutes before cooking for even heating
Batch Cooking Strategies • Double or triple recipes easily • Cook all at once, then freeze portions • Great for weekly meal prep sessions
Troubleshooting Common Issues
Even the simplest recipes can have hiccups. Here’s how to fix common cheesy garlic chicken wrap problems:
Preventing Soggy Wraps • Don’t over-sauce your chicken filling • Drain any excess liquid from ingredients before mixing • Cook on medium heat to properly crisp the exterior • Let wraps rest before cutting to prevent cheese from running
Fixing Overfilled Wraps • Remove some filling rather than fighting with difficult rolling • Use the excess filling for a quick quesadilla • Remember: less is more when it comes to wrap filling
Dealing with Uneven Cooking • Ensure your pan is completely level • Don’t overcrowd the pan – cook in batches if necessary • Adjust heat if one side cooks faster than the other
Cheese Not Melting Properly • Use room temperature cheese when possible • Shred cheese yourself rather than using pre-shredded • Cover the pan with a lid during the last minute of cooking
Wrap Falling Apart Solutions • Make sure tortillas are fresh and pliable • Don’t skip the resting time after cooking • Roll tighter initially, but don’t overstuff
Frequently Asked Questions (FAQ)
Q: How long do cheesy garlic chicken wraps take to make? A: Approximately 15-20 minutes total, including prep and cooking time. The active prep time is only about 10 minutes, making this perfect for busy weeknights.
Q: Can I make these wraps ahead of time? A: Yes! Assemble completely and refrigerate up to 24 hours before cooking. This actually allows the flavors to meld together beautifully. Just bring them to room temperature for 10 minutes before cooking.
Q: Can I freeze cooked cheesy garlic chicken wraps? A: Absolutely! Wrap individually and freeze up to 3 months. Reheat in the oven at 350°F for best results – this maintains the crispy exterior better than microwaving.
Q: What can I substitute for cream cheese in the filling? A: Greek yogurt, sour cream, or additional shredded cheese work well. Greek yogurt actually adds protein while maintaining the creamy texture.
Conclusion
These cheesy garlic chicken wraps represent comfort food at its finest – simple ingredients transformed into something absolutely irresistible through proper technique and attention to detail. Whether you’re feeding a hungry family or treating yourself to a satisfying meal, this recipe delivers every single time.
The beauty lies not just in the incredible flavor combination of tender chicken, melted cheese, and aromatic garlic, but in the recipe’s incredible flexibility. Make them spicy, keep them mild, add vegetables, or stick to the classic – every variation is a winner.
Most importantly, these wraps prove that comfort food doesn’t have to be complicated or time-consuming. In just 20 minutes, you can create a restaurant-quality meal that rivals anything you’d pay premium prices for elsewhere. So grab your ingredients, heat up that skillet, and get ready to discover your new favorite weeknight dinner solution.