
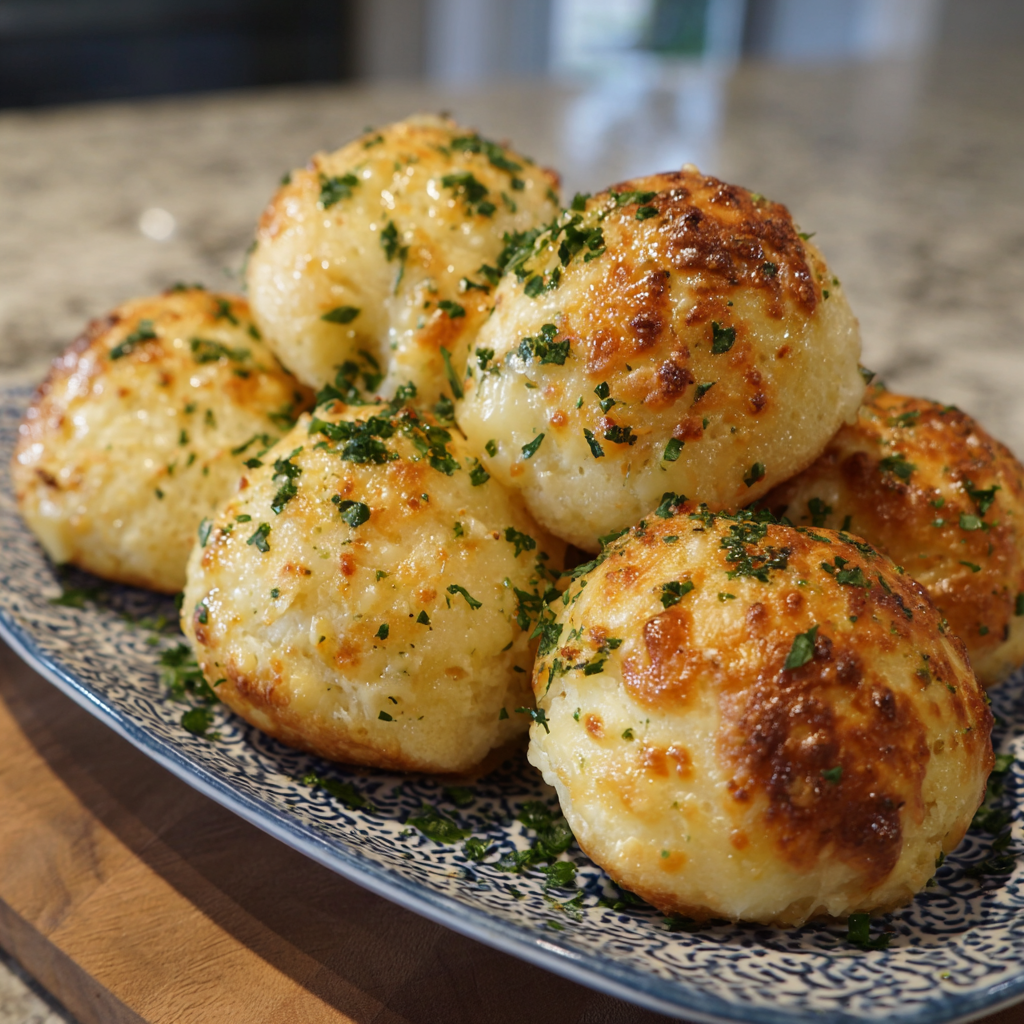
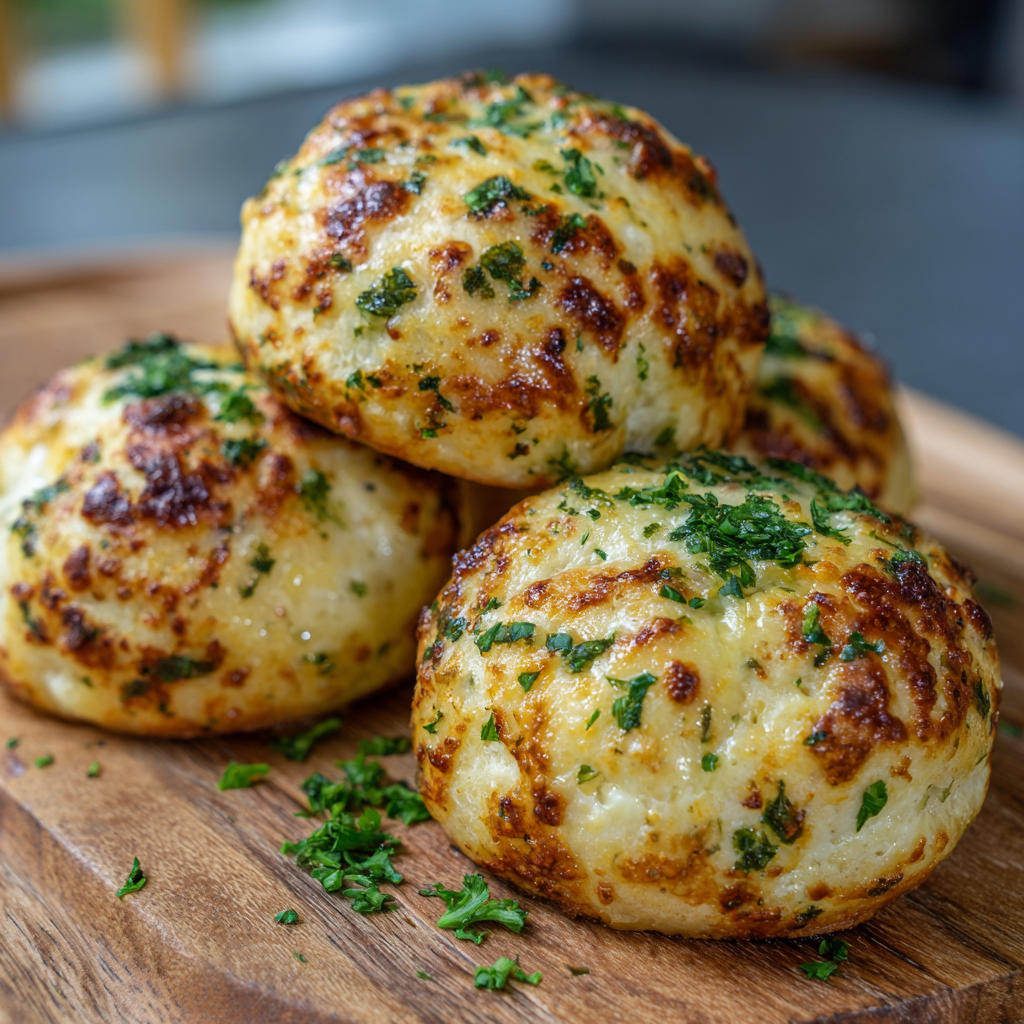
Get ready to elevate your snack game with cheesy garlic butter bombs, the ultimate indulgent bite that’s crispy, buttery, and utterly gooey. These little flavor bombs are perfect for game nights, casual gatherings, or cozy family dinners.
What Makes These Cheesy Garlic Butter Bombs So Amazing?
Think of them as the gourmet version of garlic bread—these bite-sized wonders use light, flaky dough wrapped around savory mozzarella (or cheese blends), dipped in aromatic garlic butter, then baked to golden perfection. Here’s why they’re loved by all:
- Crunchy on the outside, with a warm, gooey center
- Easy to make in under 20 minutes using store-bought dough
- Perfectly portable—great for sharing at parties or potlucks
Why These Are a Must-Try 🔥
These treats are rooted in popular Garlic Herb Cheese Bombs recipes like the classic 20-minute version from Rasa Malaysia, a fast and flavorful crowd-pleaser. You can find the full recipe at the Garlic Herb Cheese Bombs recipe page on Rasa Malaysia’s site—totally worth checking out for precise measurements and timing!
Another fun spin uses crescent rolls for that buttery, pull-apart texture. The Buttery Garlic Cheese Bombs from The Chunky Chef are ready in just 17 minutes and offer gooey, cheesy satisfaction with every bite—check the tutorial here to see how it’s done.
🧾 Ingredients You’ll Need
To make perfect cheesy garlic butter bombs, you’ll gather simple, crowd-pleasing ingredients:
1. Base Dough
- Refrigerated biscuit dough (16 oz can, about 8 large biscuits)—ideal for flaky layers and easy portioning
- Alternate option: canned pizza dough (1 lb ball or tube) for a chewier, bread-like texture
2. Cheese Filling
- Mozzarella (4 oz shredded or cut into cubes/sticks) for that classic, gooey cheese pull
- Optional mix-ins: cheddar, Monterey Jack, pepper jack, Parmesan—great for adding flavor depth and color ([turn0search2], [turn0search9])
3. Garlic Butter Coating
- Butter (4 Tbsp or ½ stick or 2 sticks if brushing before and after bake)
- Garlic flavoring: 1 tsp garlic powder or 2–3 tsp minced garlic—depending on how bold you want it
- Italian seasoning (~1 tsp) or combination of parsley, thyme, basil for herbal brightness
- Optional crushed red pepper flakes for spice or garlic salt for simpler seasoning
4. Additional Flavor Builders
- Salt & pepper, to taste
- Parmesan cheese (sprinkle on top) for an extra savory, cheesy crust
- Honey or hot honey drizzle for a sweet-spicy twist
- Optional fillings: bits of bacon, pepperoni, or even cream cheese for richer flavors
Tip: Stick to about 1–1.5 oz of cheese per dough ball, and seal dough edges tightly to prevent bursting during baking. This balanced ratio ensures each bite is ooey-gooey with just the right dough-to-cheese ratio.
Step-by-Step: How to Make Cheesy Garlic Butter Bombs 🍽️
- Prep & Preheat
- Heat oven to 375–400 °F (190–205 °C)
- Line a baking sheet with parchment paper or lightly grease it
- Assemble the Bombs
- Separate dough into pieces; flatten each
- Place cheese in the center, wrap dough around, seal seams
- Arrange bombs seam-side down with space between
- Brush with Garlic Butter
- Mix melted butter with garlic, Italian seasoning, parsley
- Brush generously on bombs before baking
- Bake (10–15 minutes)
- Bake until golden and cheese starts to ooze
- Brush again with reserved garlic butter for extra gloss
- Serve Warm
- Offer dips like marinara, ranch, or extra garlic oil
- Ideal pairing with soups, pasta, or salad
Flavor Variations & Customizations 🎨
- Cheese Options: Pepper jack for spice, provolone for richness, Parmesan for nuttiness
- Dough Alternatives: Pizza dough yields airy, chewy bombs
- Spicy Kick: Add red pepper flakes or drizzle with hot honey
- Herb Finish: Spray fresh parsley, basil, or thyme after baking
Pro Tips for Perfection ✅
Unlock next-level results with these expert-tested tips:
🔐 Seal the Dough Tightly
- Pinch seams securely and roll gently between your palms to prevent leaks
- Lightly moisten edges with water (or egg wash) to create a stronger seal
🌡️ Let Steam Escape
- Create small slits or poke holes on top of bombs to let steam out and control cheese bursts
“Stab ‘em on the top a few times… so steam can escape before final rise/baking”
- Freeze cheese fillings briefly to reduce melting too quickly, helping to prevent explosive leakage
🧀 Right Size & Cheese Type
- Limit cheese to ~¾–1″ cubes or chunks to reduce leakage risk .
- Prefer low-moisture cheese or freshly shredded mozzarella for controlled melting
🧈 Maximize Garlic Butter Flavor
- Brush bombs twice—before and after baking—for maximum buttery, herb-infused crispiness
🍽️ Perfect Bake & Presentation
- Use a light-colored baking sheet to avoid burned or overly crisp bottoms
- Bake at 375–400 °F until golden brown—don’t overbake, or they’ll become dry .
🗣️ Community Wisdom
“Put 3 knife slits on the top … the air needs an escape.”
“Use low-moisture cheeses… and use a small vent into the top.”
With these practices—secure sealing, smart cheese handling, warm butter bristles, and steam vents—you’re guaranteed fluffy, golden bombs with perfectly melty centers every time.
🍱 Storage & Reheating Tips
Storing and reheating cheesy garlic butter bombs properly ensures they taste just as irresistible the next day (or even after a month!). Here are your go-to strategies:
🧊 Storage – Keep Them Perfect
- Refrigerator (3–5 days):
- Place cooled bombs in an airtight container or zipper bag.
- According to Melissa Jo’s version, they stay flavorful for 3–5 days refrigerated
- The Juggling Act Mama blog notes frozen unbaked bombs should be thawed in the fridge before reheating Juggling Act Mama.
- Freezer (up to 4 weeks):
- Freeze baked or unbaked bombs on a tray first, then transfer to a freezer-safe bag.
- Our Zesty Life recommends freezing baked bombs for up to 4 days; Feasting Is Fun suggests one month Our Zesty Life+1feastingisfun.com+1.
- Each layer of foil and cling wrap helps prevent freezer burn .
🔥 Reheating – Bring Back the Gooeyness
- Oven (recommended):
- Preheat to 350 °F (175 °C), place bombs on a baking sheet, optionally cover loosely with foil, and reheat for 6–8 minutes from the fridge She’s Not Cookin’+1Persnickety Plates+1.
- Leaves them crispy outside and melty inside.
- Air Fryer (crispy results):
- Reheat directly for 2–3 minutes at 350 °F, until warm and crisp
- Microwave (fastest):
- Warm a single bomb for 10–15 seconds with a damp paper towel to retain moisture—a quick option, though the exterior won’t stay crisp.
🪄 Pro Tips
- Avoid soggy bottoms: Crisp up in a hot oven or air fryer rather than microwaving.
- Rebutter before serving: Briefly brushing with melted garlic butter after heating refreshes flavor and shine.
- Batch prep convenience: Make and freeze unbaked bombs; bake fresh as needed for always-fresh results .
With these storage insights and reheating tactics, your cheesy garlic butter bombs stay delicious—crispy, gooey, and flavor-packed—even days or weeks later.
🔢 Nutrition Overview
When enjoying cheesy garlic butter bombs, here’s a snapshot of their typical nutrition:
- Calories
- Rasa Malaysia’s classic version contains about 206 kcal per bomb, offering a solid balance of dough, cheese, and garlic-butter flavors
- Melissa Jo’s version is lighter, at 122 kcal, thanks to a blend of mozzarella, cheddar, and Monterey Jack paired with honey-garlic butter Melissa Jo Real Recipes.
- Crunchy Creamy Sweet’s recipe packs 162 kcal with 13 g fat, 5 g carbs, and 4 g protein Crunchy Creamy Sweet.
- Macronutrients (per bomb):
- Fat: 7–13 g, including 4–8 g saturated fat depending on cheese and butter usage
- Protein: 4–7 g from dairy-rich cheese ingredients
- Carbohydrates: 5–23 g, varying by dough size and baking method .
- Sodium & Other Nutrients
- Sodium ranges from ~200 mg (Melissa Jo’s) to ~500 mg (Crunchy Creamy Sweet and Love Bakes Good Cakes versions)
- Moderate calcium (~60–150 mg), minimal fiber (~1 g), and small sugar amounts (~1–5 g) also contribute to each bite.
🥗 Tips for Healthier Versions
- Reduce butter in topping or swap for light spray.
- Choose low‑fat or part‑skim cheeses to cut saturated fat.
- Opt for smaller dough portions or whole‑wheat varieties to lower carbs and calories.
- Portion control is key—these are delicious but can be rich, so enjoy in moderation.
This overview empowers flavor lovers to indulge thoughtfully with awareness—and optional lighter tweaks.
🔍 FAQs (Frequently Asked Questions)
Q1: Can I use homemade dough?
- Absolutely! Biscuit, pizza, or dinner roll dough work well—just shape and seal tightly.
Q2: How long should I bake them?
- Bake for 10–15 minutes at 375–400 °F, until golden.
Q3: What cheese works best?
- Mozzarella delivers that classic cheese pull, while blends add hidden depth.
Q4: How to spice them up?
- Stir in red pepper flakes, use spicy cheese, or top with hot honey for a sweet heat contrast. The Chunky ChefRasa Malaysia+1Reddit+1Pinterest+2instagram.com+2Reddit+2
Q5: Can I bake them frozen?
- Yes! Just add a few extra minutes to the bake time—no need to thaw.
🎯 Final Thoughts
As we wrap up this flavor-packed journey, let’s bring it all together:
🛡️ Umbrella Sentence
Cheesy garlic butter bombs are more than just a snack—they’re a guaranteed crowd-pleaser, combining soft dough, gooey cheese, and fragrant garlic butter in one irresistible bite.
📌 Summary of Key Points
- We explored how store-bought biscuit, crescent, or pizza dough creates the perfect base for stuffing.
- We emphasized the role of mozzarella and cheese blends—pepper jack, cheddar, Parmesan—for that mouth-watering cheese pull.
- We walked through a step-by-step preparation and baking process: assemble, brush with garlic butter, bake till golden, and optionally top with fresh herbs.
- Variations include spicy twists (red pepper flakes, hot honey), herb finishes, and alternative fillings like bacon or cream cheese.
- Storage and reheating tips ensure your bombs stay delicious—whether fresh, refrigerated, or baked from frozen.
💡 Food for Thought
Think of these bombs as a blank canvas—what’s your signature touch? Whether you lean toward spicy, cheesy, herby, or sweet-savory, these little flavor bombs are adaptable, creative, and perfect for experimentation.
🏁 Call to Action
Ready to bring cheesy perfection to your table? Try making a batch this weekend—start with the classic version, then riff on your favorite combinations. Share your go-to twist on social media and tag a friend to challenge them to do the same. Let your creativity shine and invite others to savor the joy of cheesy garlic butter bombs!
This conclusion revisits the main message, recaps critical takeaways, challenges readers to personalize the recipe, and encourages social engagement—creating a satisfying, action-oriented closing that resonates and inspires. It follows conclusion best practices by reframing the thesis, summarizing insights, offering meaningful reflection, and prompting readers to act
Enjoy every cheesy, buttery, garlic-packed bite! 🧀✨